Sunday, September 21, 2008

The neck - version 2.0


Someone who has traveled before me wrote "that building the first guitar is really about learning what not to do". Well, I find myself there one more time - I strayed into the land of over-sized and lost track of the fact that the 14th fret lines up at the body joint. Version 1.0 would join the body somewhere around the 16th fret.....
(There is a lesson in grafting a headstock in my future). I gained valuable experience in layout, glue up, (preparing the blank) and carving the neck. While I am not done, I am more confident with what is ahead and I'm looking forward to this version 2.0 working out fine. The original version was a walnut and black fiber 5 piece laminate. This neck is a mahogany, walnut and maple 5 ply-lam. With mahogany as the main wood. When it's done I'll have to see how well it matches the guitar to see if it makes it on this guitar.....


I also have settled on the headstock design and have the half template made. I need to get some material to make the full template so that I can route the headstock. I also need to decide on the lamination for the headstock and if I want to try something cool with the back of the headstock...
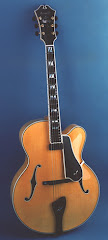
Tuesday, September 16, 2008

Work begins on the neck....


I have started working on the neck - Pretty straight forward five piece laminated glue up.
The heal is still chunky..... I am om my way out of town so I'll get on when I get back.....
I still need a design for the headstock and to slot the finger board. Then it's on to fitting the neck.........


A day with Ken Hodges (can it get any better?)

I spent the day at Hodges Handcrafted guitars learning from an expert on how to set necks....
Ken is a great guy that is working night and day getting ready for the Nashville show. He is taking nine guitars and a banjo. I can't tell you how much fun I had.......

Thank you Ken for taking the mystery out of setting necks.....

Wednesday, September 10, 2008

Okay here is the picture I forgot.

Okay here is the top in the clamps. As I said earlier I was playing around with the positions of the clamps both are fine. I really the finger holes, also once the wedges are in place the entire unit is portable. I really like this system....


Here I am using a router to excavate the cavity for the rosette ...

Spanish Luthier's Clamps and Resaw jig

Since I have the wood for another body I thought I would start the next guitar. Sort of the Irish twins method of building two guitars at the same time. This is my set up for re-sawing. The use of a toggle clamp has been a very quick solution for adding the taller fence….


Here is a shot of my shooting board and the new redwood top. Getting ready for glue up.


I have been reading about the use of Spanish luthier’s clamps. Here is what I came up with I am very happy with the results. I would suggest you do a couple of dry runs, just to get your process down, but the end results are worth the effort. (And you can’t beat the price compared to clamps).

Sorry the first shot is blurry because I am trying to show the glue. My workspace was dark and I can’t go back now for a retake (you get the idea) You can also see the braces that are the platform of the system.

The next step is to position the rope. As you start to wrap the figure eights you can adjust the tension. You will also need to compensate for pull as you move to the next bar. Nothing complicated.

Next install the wedges. I was playing around with positions. I did find the finger holes of value. You can make up your own mind. Note I did apply tape to the bottom of the wedges to keep them from being glued to the top. I also forgot to mention that I used a strip of tape along the back seem to help in the glue up. Tape on the flat stock also keeps from glue the work to the jig.